Find it fast!

Showing posts with label Make ahead. Show all posts

Monday, September 25, 2017

5 ingredient Garlic and Cilantro Green Beans with EVOO: "Lubyeh bil Zait"


Summer is most definitely over, and we are back in the insanely busy groove of things! My weekday routine is a big mesh of 3 different school pick-ups and drop offs, plus the typical myriad of after school activities. Dinner needs to be ready when the kids are, and not the other way around ;)

This has caused me to turn back to the basics, and for the first time since I've started cooking in 15 years, I made this easy easy easy green bean saute. All because I found beautiful bright and deeply green colored fresh green beans one day this past summer at my local market. I scooped them up and went home to make this, and now we eat it a few times a month. Everyone except the pickiest member of the family has surprised themselves by loving it, and I love how simple and nourishing it is. Since fresh green beans are not as easy to find these days, I keep my freezer stocked with the french green beans from Trader Joe's. They're actually even easier to cook because they're pre-washed and the ends are already snipped.


I have no idea why I've never made this before. Its a handful of ingredients and it goes so well as a side to grilled chicken or meat, or all on its own for a vegetarian dinner. I love it straight from the pot or straight from the fridge. I've never tried eating it from an actual plate...it's either piping hot off the stove or cold in a tupperware. Lol, just kidding. Or am I? You'll probably find yourself doing the same when you make it.

In Syria, this is called "lubyeh bil zait" meaning "green beans in oil". This dish relies on the THIN green beans, and there is a similar version that swaps the garlic and cilantro for onions and tomatoes, using larger green beans, but I've never been a fan of that one and just sort of forgot about this version. So glad I remembered it, and so happy to share it with you!!!
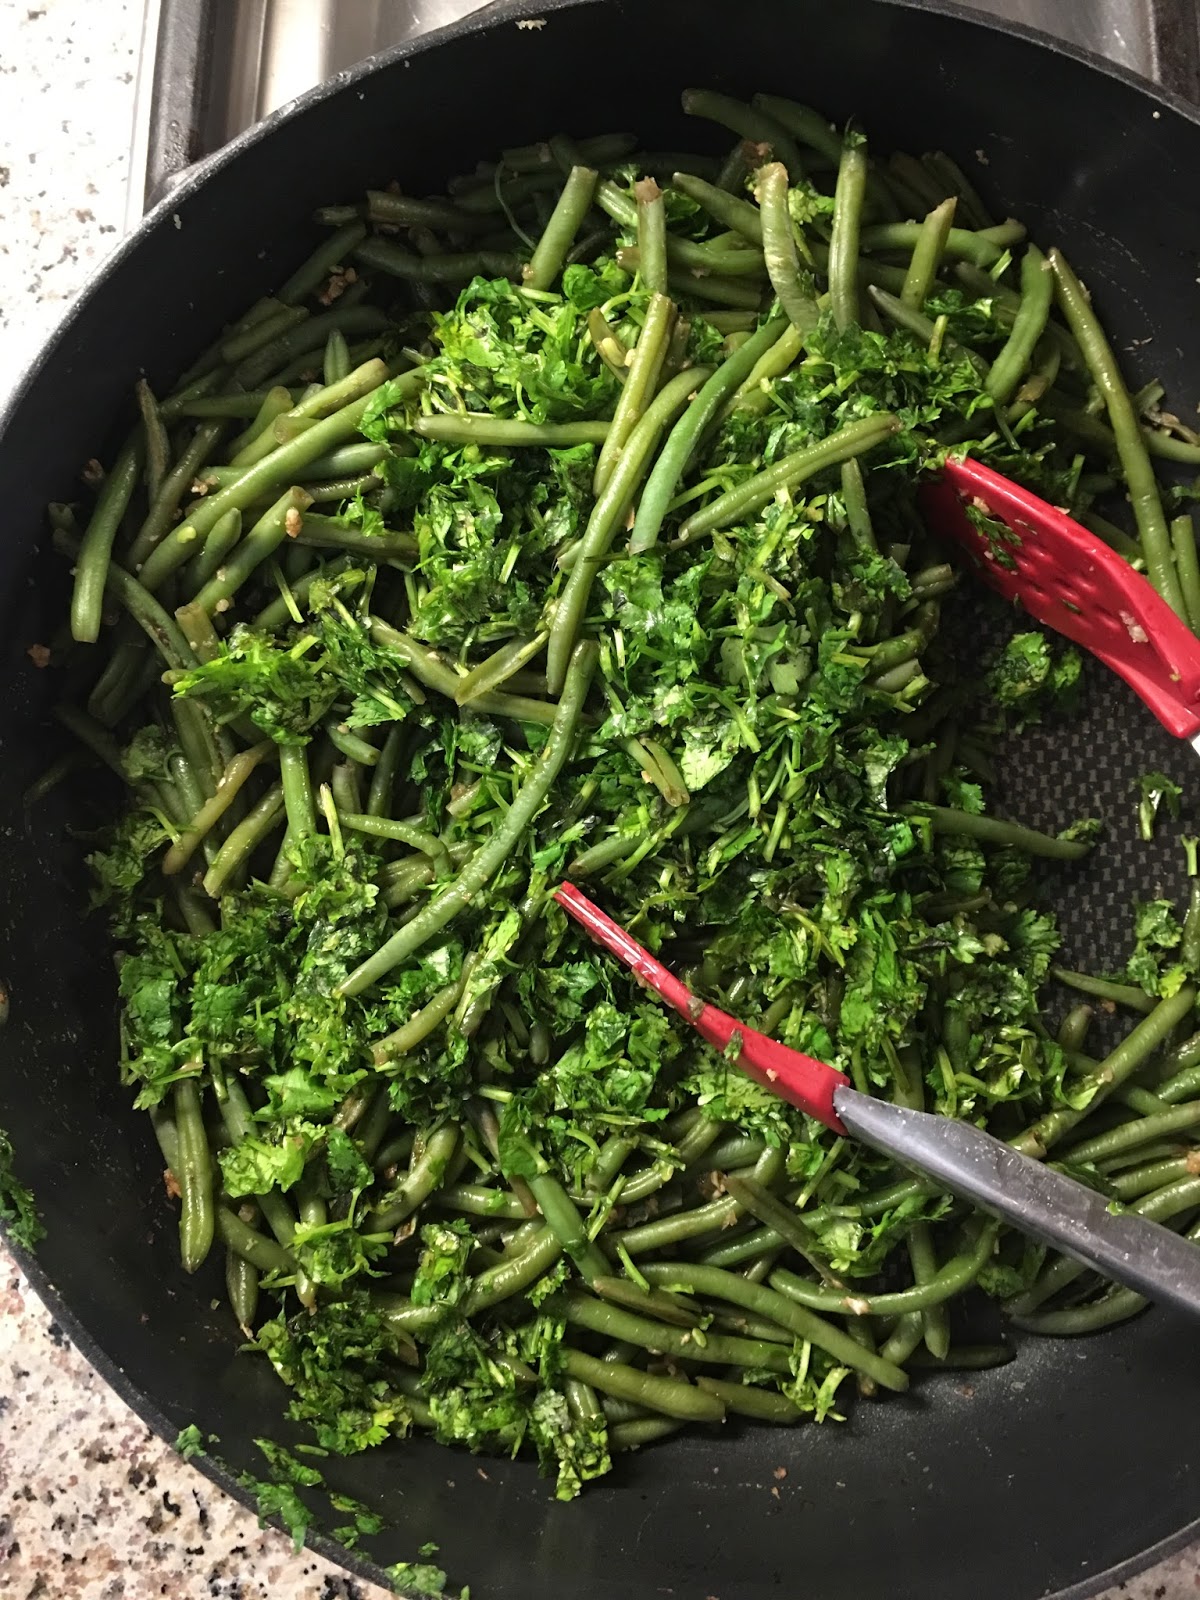


Serves 2 as a main dish and 4 as a side dish.

Ingredients
--------------
-24 ounces french green beans (frozen or fresh, look for the thinnest stalks)
-1/4 cup water, optional
-10 cloves garlic, mashed
-1/2 tablespoon salt
- 1 1/2 cups packed cilantro, chopped (1 large bunch cilantro)
-2-4 tablespoons extra virgin olive oil

Serving suggestions
-------------------------
-yogurt
-lemon
-pita bread

Directions
--------------
-Heat a medium sized pot or deep saute pan on high heat. Add the green beans (if using fresh, make sure you wash them, snip the tips on both sides, and cut them into 3 inch long pieces). Lately I have been using frozen ones because this makes the perfect short notice meal when I'm low on fresh produce. Also the beans don't need much water when they're frozen.
-Cook the beans in the covered pot for about 5 minutes. You want them to soften, but still have a slight bite to them. Mushy beans are not yummy!
-Reduce the heat to low to slowdown the cooking of the beans and add the minced garlic and salt to the green beans and give it a stir. If your beans are starting to stick to the bottom of the pot and are still too firm, add UP TO 1/4 cup water. Let the garlic become fragrant (which means it is slightly cooked).
-Add the cilantro and give the beans a mix. Cook for a minute or so longer to slightly wilt the cilantro, and turn off the heat.
-Add the olive oil and mix. I start with 2 tablespoons (to keep it lower in fat) and will add more if I'm making this dish for company.
-Serve hot, warm, or room temperature with optional yogurt, a squeeze of lemon, and pita bread.
-Enjoy!!!

I'd love to connect with you! Stay updated on the latest posts through Facebook or follow savvy_chef on Instagram. Tag #savvychef with your re-creations!

Wednesday, March 16, 2016

Maple Glazed Apple Cider Muffins (Vegan)


Sometimes the best recipes come from random things sitting in the fridge or pantry. Day after day I was opening my fridge and staring straight at an opened bottle of apple cider. The unfiltered kind from the bottled juice section at Trader Joe's, not the the sparkling variety. I don't like to give my family too much juice and had only bought this for a recent brunch. Finally I pulled it out determined to make something delicious out of it, and these muffins are the result. Just the right sweetness, so much warmth from the cinnamon, and a happy burst of maple glaze right on top!


These muffins are ridiculously easy and just SO. MOIST. They literally melt on your tongue. I credit that to the amount of juice used in the recipe. When you pour your batter into the cupcake cups you'll feel like its almost soup-y. Have no fear, that translates into softness! The brown sugar gives a lovely hint of molasses and of course contributes to the perfect texture in these gems. You'll notice there are no eggs..you don't need them! This recipe is developed for maximum fluffy texture, and eggs are more useful when you're aiming for a dense treat. We make up for the loss of moisture with more liquid :) The vinegar helps the muffins rise but I promise you can't taste it, don't leave it out!


Yields 15 muffins

Ingredients
---------------
-2 1/4 cups flour
-3/4 cup granulated sugar
-3/4 cup brown sugar
-1 1/2 teaspoons baking soda
-3/4 teaspoon salt
-1 tablespoon ground cinnamon
-1/4 teaspoon nutmeg
-1/4 teaspoon cloves
-1 1/2 cups apple cider at room temperature (can also use apple juice) *If not room temperature, microwave for 30 seconds or so. Do not let the liquid get hot*
-1/2 cup vegetable oil
-1 1/2 tablespoons apple cider vinegar
-1 1/2 teaspoons vanilla extract

*Optional: 1/2 cup dried raisins or chopped walnuts/pecans

Glaze
--------
-1 tablespoon maple syrup (sub apple cider/juice if you do not have maple syrup)
-1/4 cup powdered sugar (you may need an extra tablespoon)

Instructions
----------------
-Preheat oven to 350 degrees
-Line a cupcake pan with liners or spray cavities with a non-stick cooking spray. 
-In a large bowl combine the flour, granulated sugar, brown sugar, baking soda, salt, cinnamon, nutmeg and cloves. Mix together and set aside.
-In a medium bowl combine the apple cider juice , vegetable oil, vinegar and vanilla.
-Add the wet (apple juice mixture) ingredients to the dry (flour mixture) ingredients and stir until well blended. Add optional raisins or chopped nuts.
-Fill the lined cupcake cavities 3/4 full and bake on a lower middle rack in oven for 18-22 minutes (mine were perfect at 20) or until a few moist crumbs stick to a toothpick inserted in the middle of a muffin.
-Remove the muffins from oven and allow to cool.
-While the muffins are baking, in a small bowl blend together the apple cider and powdered sugar mixture. I use a mini whisk to get a smooth texture. If the glaze is too runny, add a little bit more powdered sugar.
-When the muffins have cooled, dip the top of each muffin into the glaze and hold upside down while the extra glaze drips off back into the bowl. After I dip all the muffins, I like to re-dip each muffin again after the glaze has set a bit for a nice thick coating.  Allow glaze to harden and serve. Store extra muffins tightly covered at room temperature for 3-5 days.
-Enjoy!


I'd love to connect with you! Stay updated on the latest posts through Facebook or follow savvy_chef on Instagram. Tag #savvychef with your re-creations!

 Walnut Baklava


Thursday, March 10, 2016

Nutella Peanut Butter Stuffed French Toast Bake


Lately I've played with various versions of baked french toast. The BEST french toast (I have to say right from the start that I'm not usually a fan) I've ever had is from The Griddle Cafe in Los Angeles. If you can make it there to get their 'peanut bubba' french toast, you should! This is my ode to that amazing "dessert-disguised-as-breakfast" dish. 

I've hosted a ton of brunches, and without a doubt my tip to success is advance preparation. You don't have the whole day to get a meal ready for breakfast...unless you start the day before. I try to make at least 2 entrees that are 90% ready to go the evening leading up to my gathering, and no matter how hectic things get in the early morning as I'm trying to finish on time, it helps to know I've got a couple things crossed off the list.  This french toast is also perfect for family mornings when you want to wake up, be lazy and still have a delicious homemade breakfast to eat. Let's be honest, this is more dessert than breakfast, but hey, who's complaining?


It took a couple tries to get the exact ratio of eggs/cream/milk for the batter, and now these measurements will give you soft, fluffy french toast with a crispy top. The graham crackers are a fun addition for flavor and texture. The first time I made this french toast it was a strictly peanut butter version (refer back to the first paragraph) and that's when I took the photos. It was amazing as is, but to please the weirdos in my family who don't approve of pb, I threw in the Nutella the next few times around and it was WOW. Complete pb and Nutella bliss. The cookie crumbles on top, freshly whipped cream, warm maple syrup...this is the breakfast that dreams are made of. 

Not a fan of peanut butter? This would taste sooo good if you swap out the pb for cookie butter! Leave it out and use only the Nutella (or vice versa) for other variations. Sliced bananas stuffed in with the filling would also be a nice touch. The possibilities are endless!

All prepped and ready to bake!

Makes 16 slices
Ingredients
-------------------
-3 eggs
-1/4 teaspoon salt
-1 tablespoon vanilla
-2/3 cup cane sugar
-1 cup milk
-1 cup heavy cream
-1 teaspoon cinnamon
-3 full sheets graham crackers, finely crushed
-1 loaf french bread, day old preferred
-1/2 cup peanut butter
-1/2 cup powdered sugar
-1/3 cup heavy cream
-1 teaspoon vanilla
-2 cups Nutella

Optional toppings
------------------------------
-maple syrup
-fresh whipped cream
-sliced bananas

To make
---------------
-In a 13x9 baking dish,  crack your eggs and beat them with a fork or whisk. Add salt, vanilla, sugar, milk, cream and cinnamon and whisk the entire mixture. Set aside.
-Starting with a clean surface or cutting board, slice a loaf of thick french bread (or brioche) horizontally leaving the edge attached and lay open. Now your loaf will be split open like you are about to layer a sandwich.
-In a medium bowl whisk together peanut butter, powdered sugar, heavy cream and vanilla until smooth. Spread the mixture on 1 side of the split loaf of bread.
-On the other length of the split loaf spread the Nutella mixture in a nice thick layer. Make sure your peanut butter mixture and your Nutella extends all the way to the edges of the bread. Gently close the loaf of bread. Now you have a layer of peanut butter and a layer of nutella over it between 2 layers of bread.
- Using a serrated bread knife, carefully cut 16 slices out of the peanut butter Nutella loaf.
-One slice at a time, dip each piece of french toast into the egg mixture. Make sure you dip them on both sides so the bread can soak properly. After you dip the slices layer them in two rows across the baking dish.
-Coarsely crush the graham crackers over the top of the french toast. Cover and refrigerate 6 - 12 hours (overnight).
-When you are ready to bake the french toast, uncover and place it in a preheated oven  at 425 degrees for 25-30 minutes on the lower rack of your oven.
-Remove your french toast from the oven and give it a generous drizzle of maple syrup.
-Serve with fresh whipped cream, sliced bananas, and extra maple syrup on the side.
- Enjoy!

I'd love to connect with you! Stay updated on the latest posts through Facebook or follow savvy_chef on Instagram. Tag #savvychef with your re-creations!

Try these other brunch favorites!

Tisi'yeh/Fattet Hummus
Classic Banana Bread
Raspberry Oat Bars
Cheese and Parsley Pasta: Middle Eastern Mac n' Cheese


Tuesday, February 23, 2016

Classic Banana Bread


Without a doubt, banana bread is the single most frequently baked treat in my home. I look for ripe bananas at the market so we don't have to wait too long for them to be ready at home...I make a loaf weekly and it doesn't EVER see its 3rd day. At this point baking banana bread has an emotional significance to me because its become one of those unintentional traditions...my kids come home on Monday to the fragrant smells of banana and vanilla and have a slice after school. After dinner, they grab another slice. The next morning on their way out to school, they grab yet another piece...by the time they get home they're lucky if there's any left...and they wait for the following Monday to get their "bb" fix again. Banana bread makes Mondays a little less bleak, and who doesn't love that?!


If you go through my blog, you'll find several versions of this yummy cake. Here's how this new and improved version is different:


1) I've gone back to the basics and removed any extra ingredients or flavors (Greek yogurt, pumpkin, pumpkin butter, oats, etc.) to celebrate banana bread in all its glory, as a simple and utterly amazing bread. This translates into quicker prep time and fewer ingredients for you.


2) The texture of  banana "bread" instead of banana "cake" has been achieved with the tweaking of measurements. I'll let you in on my hugest revelation...an extra EGG was what it took to get a perfectly dense crumb on this treat (and not Greek yogurt or honey or any of the other stuff I've played with over the years).


3) Flax seeds are amazing. Adding them instead of walnuts takes care of potential nut allergies, gives a huge boost of nutrition and provides the nutty flavor that so many of us love with banana bread. If you don't like them, not a problem, just leave them out!


4) MOST IMPORTANT: Your bananas must be RIPE RIPE RIPE RIPE RIPE. And by ripe I mean too brown to enjoy on their own, but not nasty enough that you need to toss them out. When bananas get very ripe, their flavor deepens and they become sweeter, then when they're baked you will get that intense banana flavor that resembles a professional baked treat. Whatever you do, resist the urge to prepare this banana bread without ripe bananas, it will be the difference between an average bread and an AMAZING one (and you are completely capable of amazing, regardless of your experience!).


Makes 16 slices when baked in a bundt pan

Ingredients
---------------
-3 eggs
-1/2 cup granulated sugar
-1/2 cup brown sugar
-1 teaspoon vanilla
-1/3 cup melted coconut oil (or vegetable oil)
-4 OVER RIPE mashed bananas (2 cups)

-2 cups flour
-1 1/2 teaspoons baking soda
-1/2 teaspoon salt
-1 teaspoon ground cinnamon

Optional add-ins (up to 1 cup total)
-------------------------------------
-1 tablespoon flax seeds
-chopped nuts
-chocolate chips
-chopped dried fruit or dates

To make
------------
-Preheat oven to 350 degrees and grease a bundt pan.
-Using an electric mixer or by hand, mix eggs, granulated sugar, brown sugar and vanilla together. Stir in melted coconut oil and mashed bananas.
-In another bowl, stir the dry ingredients (flour, baking soda, salt, ground cinnamon) together and slowly add to the banana mixture. Stir until everything is moistened but DO NOT overmix so your banana bread stays moist. Gently add optional flax seeds or other add-ins.
-Pour mixture in greased pan and bake on the lower rack of a preheated oven for 40-50 minutes (I take mine out at 45 minutes). If you are baking in a loaf pan your bake time will be closer to 60 minutes. Your banana bread is finished when an inserted toothpick comes out with a few crumbs attached.
-Remove from the oven and cool completely. Flip onto a platter and garnish with optional powdered sugar. Serve.
-Enjoy!

I'd love to connect with you! Stay updated on the latest posts through Facebook or follow savvy_chef on Instagram. Tag #savvychef with your re-creations!

Try these other treats!

Skinny Banana Oat Muffins
Vegan Orange Muffins

Double Chocolate Zucchini Cake

Chocolate Pumpkin Cupcakes with Cream Cheese Frosting


Monday, February 22, 2016

Vegan Lentil Kibbeh


I felt like I hit the jackpot when this recipe worked out. It was a complete gamble to toss out the main ingredient in kibbeh and expect success, but it paid off! Kibbeh is a VERY traditional Syrian dish (other regions in the Middle East also have their versions) and there are too many variations to list. Typically the main ingredients in kibbeh are MEAT, bulgur and onion. These 3 ingredients are minced together with simple seasonings using a meat grinder to achieve a smooth dough. This outer dough is formed into a football shape, stuffed with cooked ground beef, onions and nuts then fried. If you haven't had authentic kibbeh I urge you to do so, its delicious! Personally I rarely make this version of kibbeh because its ridiculously time consuming, requires special equipment, makes a huge mess, shaping is difficult, and it must be deep fried. All of these are huge no-no's for me....so I've simplified the process and begun making kibbeh kabobs (also known as kibbeh al-siekh), essentially the outer shell of the kibbeh without the filling and frying process. From that recipe this new vegan kibbeh has emerged.


This is a meat-less kibbeh packed with fiber, protein and flavor. There is no fat added to the mix, but you'd never guess that while eating it! I love making it because all the ingredients are pantry staples, it comes together quickly and my family loves it. My mom (who is famous for her amazing varieties of kibbeh) couldn't believe this didn't have meat it in, that's how close the flavor and texture is!


This kibbeh serves many purposes for me. I'll make a batch and serve it for dinner then freeze the rest (it reheats BEAUTIFULLY). I'll make the mix a day or two ahead and bake them up for a dinner party. I take them along to picnics because they are as good at room temperature as they are hot, and there is no worry about any of the ingredients being out for too long (a perk of a vegan recipe even for those who eat meats and dairy). This kibbeh is the perfect snack on the go because it doesn't make a mess and keeps you feeling full for a while.


Try this with a side of babbaganoush, lentil soup, cucumber yogurt sauce, and a veggie platter loaded with tomatoes, thinly sliced lemon wedges, red onion, parsley and pickles. I have another fabulous idea for you: VEGGIE BURGERS! Trust me on this one. Get mini-pitas or buns and fill them with a green, a kibbeh patty, tomato, red onion, lemon slices and cucumber yogurt sauce. Amazingness and the absolute perfect lunch.


Yields 16 kibbeh patties

Ingredients
---------------
-1 cup red lentils
-3/4 cup fine bulgur (#1)
-1 cup water
-1/2 cup onion (1/2 of a large onion)
-2 tablespoons red pepper paste
-1 1/2 teaspoons all spice
-2 teaspoons ground coriander
-1 teaspoon ground cumin
-1 teaspoon salt (to start, adding 1/2 teaspoon more if needed...which I usually do)
-1/4 teaspoon ground black pepper

optional: vegetable oil for baking

To make
-----------
-Fill a medium sized pot with water. Rinse the lentils in a strainer and place in pot of water. Bring to a boil on high heat, watching to make sure the foam of your lentils doesn't boil over in the pot.  Cook for 15-20 minutes or until the lentils are tender. Drain the extra liquid in a strainer.
-While the lentils are cooking place the bulgur with 1 cup water in a medium sized bowl and let soak.
-In a food processor, process the onion until it is finely minced. Add the drained cooked lentils, the soaked bulgur, red pepper paste, all spice, coriander, cumin, salt and pepper and process using the pulse setting until everything is blended together. Taste the mixture and adjust salt if needed.
-Place the food processor bowl in the fridge to firm the mixture up. This will help you shape them into patties, but if you are short on time it is not critical.
-Line a baking sheet with parchment paper (I really recommend this so the patties don't stick) or foil and pre-heat oven to 425 degrees Fahrenheit.
-Lightly wet your hands to form the patties. This will prevent the mixture from sticking to your hands as you work. Take 2 tablespoons of kibbeh mixture and shape into round patties, about 1/4 inch thick and 2 inches wide. Repeat the process until mix is finished. Place kibbeh patties on baking sheet and OPTIONALLY brush each side with vegetable oil (I usually skip this but it does make the kibbeh a little more crispy.
-Bake on the middle rack of pre-heated oven for 20-30 minutes, flipping halfway through until crisped to your liking.**Alternatively you can cook these on a stove top in a skillet with some oil.
-Serve with desired dipping sauce and sliced veggies.
-Enjoy!


I'd love to connect with you! Stay updated on the latest posts through Facebook or follow savvy_chef on Instagram. Tag #savvychef with your re-creations!


Wednesday, February 17, 2016

Chocolate Fig Truffles


If you guys follow my instagram you'll notice I have a have a major summer fling with figs. I just can't get enough of that plump fruit and literally track each individual fig as it grows on my humble tree. Unfortunately the season (and my crop) is short lived and I'm left dreaming of the fruit throughout the rest of the year. Enter dried figs. Although not as amazing, they are still REALLY good and can fill in for their superiors 11 months out of the year.


This is a ridiculously healthy "dessert". It's the perfect treat with coffee or tea and the sweetness hits all the right spots without being decadent and heavy. I make a batch of these and keep them in a cute box in the pantry and they stay fresh and delicious for a couple months. 


The combination of flavors will really have you cautious (fig, ginger, orange zest and honey?), but proceed with confidence because these flavors compliment each other fabulously. It goes without saying that chocolate makes everything better, and in this case it rounds out the other strong flavors and makes them flow. I really love these :)


Try dipping the chocolate in nuts to customize to your liking! I like to use pistachios and honey roasted almonds. I'll even add some chopped candied orange peel to the nut mixture. So delish.


Makes 16 truffles

Ingredients
--------------
-1/8 cup crystallized ginger (use 1/4 teaspoon ground ginger if you must substitute OR use candied orange peel)
-2 cups dried figs
-2 tablespoons honey
-1/2 teaspoon orange zest
-1/2 teaspoon cinnamon powder
-1/2 teaspoon vanilla extract
-1/2 cup chocolate chips (I use dark chocolate, pick your preference)

Optional: chopped nuts to dip truffles in

To make
------------
-Using a food processor, pulse the crystallized ginger until it breaks down until smooth. Add the dried figs, honey, orange zest, cinnamon and vanilla then continue processing until the whole mixture is a smooth paste. You may have a few chunks of figs remaining, which is OK. Taste the filling and adjust sweetness. The other flavors will become stronger after a few hours of sitting together).
-Prepare a tray lined with parchment paper. Scoop a scant tablespoon of filling and form into a ball. Repeat the process until you have used all of your filling. If you have the time, refrigerate (or freeze briefly) until the filling is firm. This makes it easier to roll them but is not a necessary step. 
-Melt the chocolate in a small bowl in your microwave in 15 second intervals, stirring briefly until all the chocolate is melted and smooth.
-Dip each truffle into the chocolate and tap off the excess chocolate. If using chopped nuts, place them in a small bowl and dip the top of each chocolate covered truffle. Place on the parchment paper and continue the process until all the truffles are dipped. If you run out of chocolate, melt some more and continue dipping!
-Leave the truffles undisturbed until the chocolate has set.
-Store tightly covered at room temperature (or if the weather is hot, refrigerate).
-Enjoy!

*Recipe adapted from Ellie Krieger on the Food Network*


I'd love to connect with you! Like SavvyChef on facebook and follow Savvy_Chef on instagram. Tag Savvychef in your creations and pin the recipes on pintrest :)


Chocolate Date Bars


Balsamic Fig and Arugula Pizza


Tuesday, January 26, 2016

Beet Hummus (Mutabal Shawandar)


Beet Hummus is a traditional Syrian appetizer known as "mutabal shawandar," literally translating to "beet dip."  I'm classifying it as hummus because of the parallel to traditional chick pea hummus with the inclusion of tahini and lemon. As a child my mom did not make this and we would only eat it occasionally on trips to the Middle East, so I've put this together using only my sense of taste and memory and when my older family members (who are TOUGH critics when it comes to authentic cooking) tried it they gave a thumbs up...after some constructive criticism of course ;)

If you buy your beets boiled and peeled to save time (Trader Joe's and Costco both sell them in the refrigerated section of their markets) this is literally done in 3 minutes. So.so.so. easy and I LOVE the POP of color! This is a great side dish for game nights, bbq's or as a snack. Serve it cold or at room temperature...prepare it in advance and give it a quick stir before serving...no matter how you eat it the bright hues will cheer you up and satisfy your eyes before you even take a bite.


I'm a huge fan of using seasonal produce throughout the year and beets get major points because as a root veggie they are easy to get a hold of at any time. During the winter I love to eat this because I find it fun and refreshing, and during the summer its really satisfying because it's light and doesn't require any heated preparation. Anytime I can spend less effort for great results I'm in! Who's with me?


Funny story about the picture above. I took this plate out to photograph it and my boys came running after me wanting to get in the shots. One was dressed in an Iron Man costume and the other was mid costume switch lol.  They each grabbed a pita chip and cucumber and took a dip into the hummus. Without thinking about it Iron Man took a bite and exclaimed in surprise "Wow, I actually like it!"  When I finished my photos they eagerly polished off everything on the plate...needless to say I was thrilled because beets are SO HIGH in vitamin c and are an excellent immune booster and form of potassium and fiber! Go make this!!!


Serves 4-6

Ingredients
---------------
-1 pound peeled and boiled beets
-1/4 cup Greek yogurt
-2 tablespoons tahini
-1 tablespoon lemon juice
-1 tablespoon pomegranate molasses
-1 teaspoon salt, plus more to taste

Optional garnish: chopped parsley, walnuts, olive oil or black sesame seeds

*Serve with pita chips, pita bread, crackers and a variety of veggies

To make
------------
-Place you boiled and peeled beets (make sure they are cold and you have drained them from any liquid) into a food processor and pulse the mixture together until they are in small chunks. Do not puree to a complete paste to retain some texture in your dip.  If you do not own a food processor, you can grate the beets using a vegetable grater on the coarse side of the grater.
-Add the remaining ingredients (Greek yogurt, tahini, lemon juice, pomegranate molasses and salt) and mix together. Taste and adjust salt/pomegranate molasses content until it is tangy enough for your taste. If your dip is too watery, add more tahini. If it is too thick, add a little more Greek yogurt. Do not add water!
-Transfer to a bowl and add optional garnish.
-Serve with pita chips/bread/fresh veggies and enjoy!


Try these other delicious dips!

Babbaganoush
Guacamole
Olive and Garlic Cheese Dip

 I'd love to connect with you! Like SavvyChef on facebook and follow Savvy_Chef on instagram. Tag Savvychef in your creations and pin the recipes on pintrest :)