Find it fast!

Showing posts with label dinner. Show all posts

Monday, September 25, 2017

5 ingredient Garlic and Cilantro Green Beans with EVOO: "Lubyeh bil Zait"


Summer is most definitely over, and we are back in the insanely busy groove of things! My weekday routine is a big mesh of 3 different school pick-ups and drop offs, plus the typical myriad of after school activities. Dinner needs to be ready when the kids are, and not the other way around ;)

This has caused me to turn back to the basics, and for the first time since I've started cooking in 15 years, I made this easy easy easy green bean saute. All because I found beautiful bright and deeply green colored fresh green beans one day this past summer at my local market. I scooped them up and went home to make this, and now we eat it a few times a month. Everyone except the pickiest member of the family has surprised themselves by loving it, and I love how simple and nourishing it is. Since fresh green beans are not as easy to find these days, I keep my freezer stocked with the french green beans from Trader Joe's. They're actually even easier to cook because they're pre-washed and the ends are already snipped.


I have no idea why I've never made this before. Its a handful of ingredients and it goes so well as a side to grilled chicken or meat, or all on its own for a vegetarian dinner. I love it straight from the pot or straight from the fridge. I've never tried eating it from an actual plate...it's either piping hot off the stove or cold in a tupperware. Lol, just kidding. Or am I? You'll probably find yourself doing the same when you make it.

In Syria, this is called "lubyeh bil zait" meaning "green beans in oil". This dish relies on the THIN green beans, and there is a similar version that swaps the garlic and cilantro for onions and tomatoes, using larger green beans, but I've never been a fan of that one and just sort of forgot about this version. So glad I remembered it, and so happy to share it with you!!!
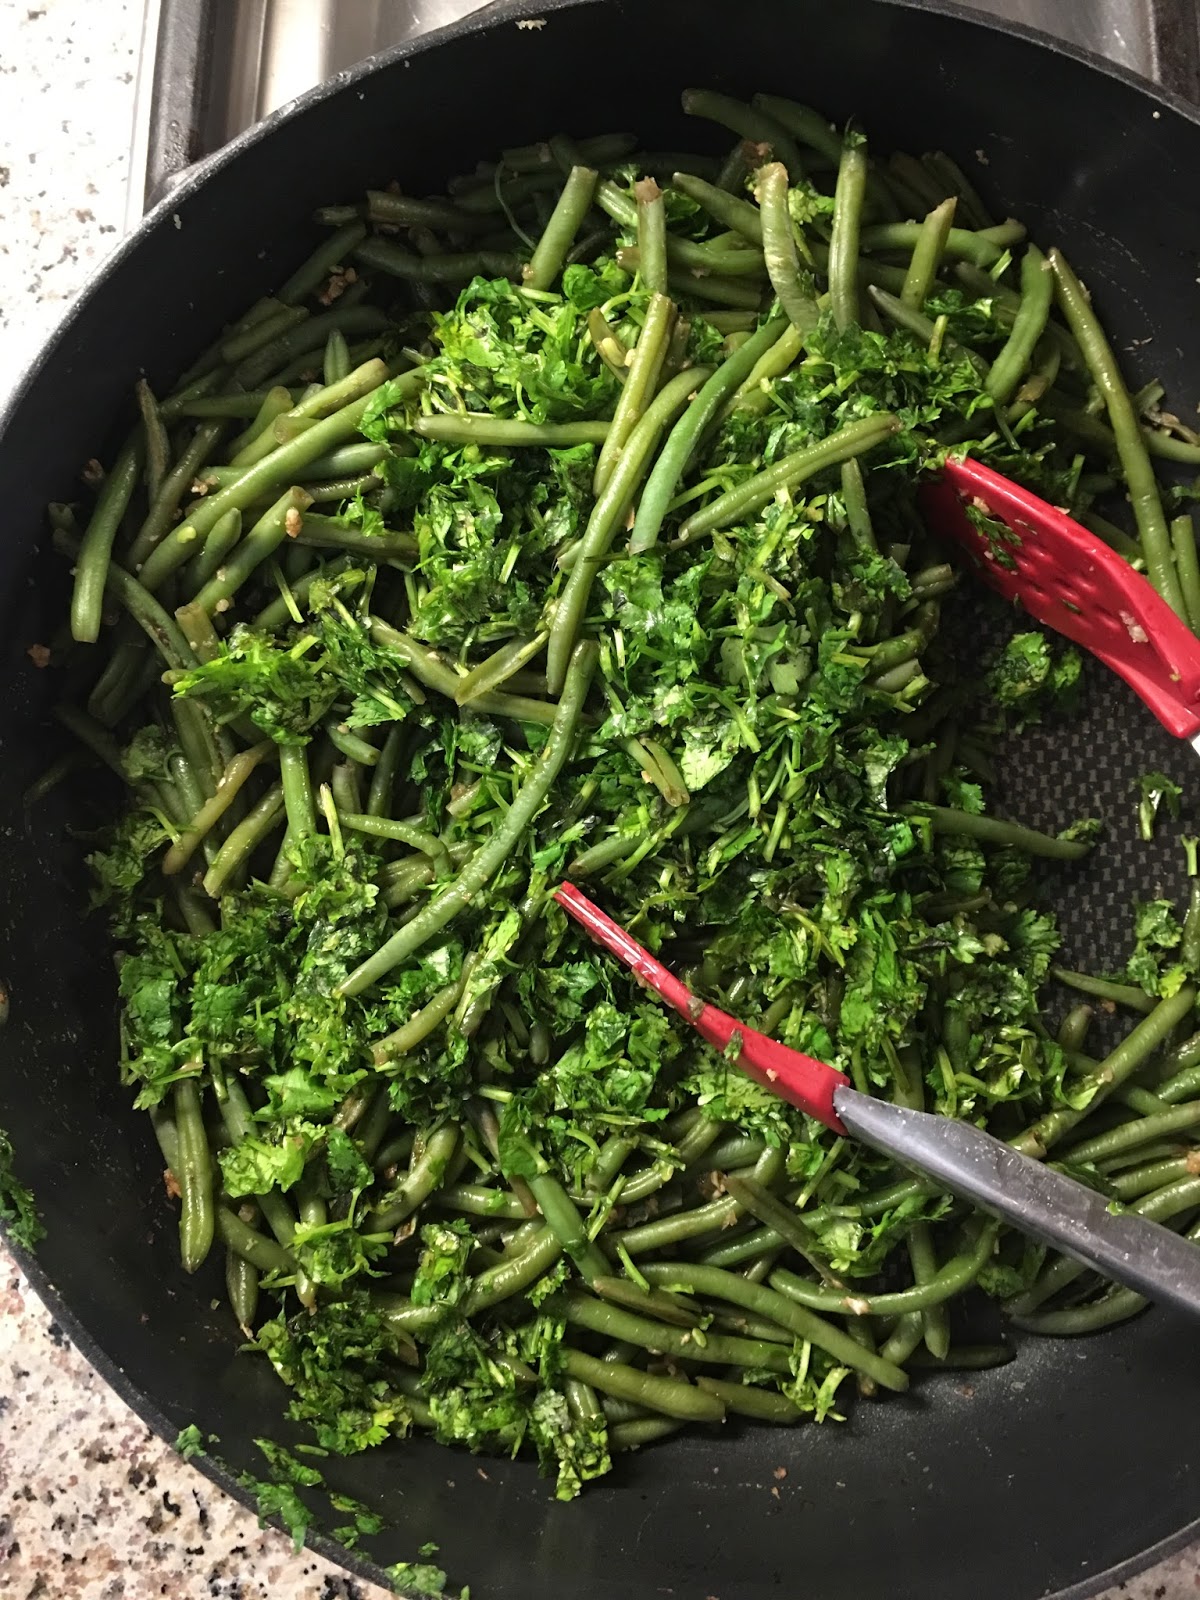


Serves 2 as a main dish and 4 as a side dish.

Ingredients
--------------
-24 ounces french green beans (frozen or fresh, look for the thinnest stalks)
-1/4 cup water, optional
-10 cloves garlic, mashed
-1/2 tablespoon salt
- 1 1/2 cups packed cilantro, chopped (1 large bunch cilantro)
-2-4 tablespoons extra virgin olive oil

Serving suggestions
-------------------------
-yogurt
-lemon
-pita bread

Directions
--------------
-Heat a medium sized pot or deep saute pan on high heat. Add the green beans (if using fresh, make sure you wash them, snip the tips on both sides, and cut them into 3 inch long pieces). Lately I have been using frozen ones because this makes the perfect short notice meal when I'm low on fresh produce. Also the beans don't need much water when they're frozen.
-Cook the beans in the covered pot for about 5 minutes. You want them to soften, but still have a slight bite to them. Mushy beans are not yummy!
-Reduce the heat to low to slowdown the cooking of the beans and add the minced garlic and salt to the green beans and give it a stir. If your beans are starting to stick to the bottom of the pot and are still too firm, add UP TO 1/4 cup water. Let the garlic become fragrant (which means it is slightly cooked).
-Add the cilantro and give the beans a mix. Cook for a minute or so longer to slightly wilt the cilantro, and turn off the heat.
-Add the olive oil and mix. I start with 2 tablespoons (to keep it lower in fat) and will add more if I'm making this dish for company.
-Serve hot, warm, or room temperature with optional yogurt, a squeeze of lemon, and pita bread.
-Enjoy!!!

I'd love to connect with you! Stay updated on the latest posts through Facebook or follow savvy_chef on Instagram. Tag #savvychef with your re-creations!

Monday, February 22, 2016

Vegan Lentil Kibbeh


I felt like I hit the jackpot when this recipe worked out. It was a complete gamble to toss out the main ingredient in kibbeh and expect success, but it paid off! Kibbeh is a VERY traditional Syrian dish (other regions in the Middle East also have their versions) and there are too many variations to list. Typically the main ingredients in kibbeh are MEAT, bulgur and onion. These 3 ingredients are minced together with simple seasonings using a meat grinder to achieve a smooth dough. This outer dough is formed into a football shape, stuffed with cooked ground beef, onions and nuts then fried. If you haven't had authentic kibbeh I urge you to do so, its delicious! Personally I rarely make this version of kibbeh because its ridiculously time consuming, requires special equipment, makes a huge mess, shaping is difficult, and it must be deep fried. All of these are huge no-no's for me....so I've simplified the process and begun making kibbeh kabobs (also known as kibbeh al-siekh), essentially the outer shell of the kibbeh without the filling and frying process. From that recipe this new vegan kibbeh has emerged.


This is a meat-less kibbeh packed with fiber, protein and flavor. There is no fat added to the mix, but you'd never guess that while eating it! I love making it because all the ingredients are pantry staples, it comes together quickly and my family loves it. My mom (who is famous for her amazing varieties of kibbeh) couldn't believe this didn't have meat it in, that's how close the flavor and texture is!


This kibbeh serves many purposes for me. I'll make a batch and serve it for dinner then freeze the rest (it reheats BEAUTIFULLY). I'll make the mix a day or two ahead and bake them up for a dinner party. I take them along to picnics because they are as good at room temperature as they are hot, and there is no worry about any of the ingredients being out for too long (a perk of a vegan recipe even for those who eat meats and dairy). This kibbeh is the perfect snack on the go because it doesn't make a mess and keeps you feeling full for a while.


Try this with a side of babbaganoush, lentil soup, cucumber yogurt sauce, and a veggie platter loaded with tomatoes, thinly sliced lemon wedges, red onion, parsley and pickles. I have another fabulous idea for you: VEGGIE BURGERS! Trust me on this one. Get mini-pitas or buns and fill them with a green, a kibbeh patty, tomato, red onion, lemon slices and cucumber yogurt sauce. Amazingness and the absolute perfect lunch.


Yields 16 kibbeh patties

Ingredients
---------------
-1 cup red lentils
-3/4 cup fine bulgur (#1)
-1 cup water
-1/2 cup onion (1/2 of a large onion)
-2 tablespoons red pepper paste
-1 1/2 teaspoons all spice
-2 teaspoons ground coriander
-1 teaspoon ground cumin
-1 teaspoon salt (to start, adding 1/2 teaspoon more if needed...which I usually do)
-1/4 teaspoon ground black pepper

optional: vegetable oil for baking

To make
-----------
-Fill a medium sized pot with water. Rinse the lentils in a strainer and place in pot of water. Bring to a boil on high heat, watching to make sure the foam of your lentils doesn't boil over in the pot.  Cook for 15-20 minutes or until the lentils are tender. Drain the extra liquid in a strainer.
-While the lentils are cooking place the bulgur with 1 cup water in a medium sized bowl and let soak.
-In a food processor, process the onion until it is finely minced. Add the drained cooked lentils, the soaked bulgur, red pepper paste, all spice, coriander, cumin, salt and pepper and process using the pulse setting until everything is blended together. Taste the mixture and adjust salt if needed.
-Place the food processor bowl in the fridge to firm the mixture up. This will help you shape them into patties, but if you are short on time it is not critical.
-Line a baking sheet with parchment paper (I really recommend this so the patties don't stick) or foil and pre-heat oven to 425 degrees Fahrenheit.
-Lightly wet your hands to form the patties. This will prevent the mixture from sticking to your hands as you work. Take 2 tablespoons of kibbeh mixture and shape into round patties, about 1/4 inch thick and 2 inches wide. Repeat the process until mix is finished. Place kibbeh patties on baking sheet and OPTIONALLY brush each side with vegetable oil (I usually skip this but it does make the kibbeh a little more crispy.
-Bake on the middle rack of pre-heated oven for 20-30 minutes, flipping halfway through until crisped to your liking.**Alternatively you can cook these on a stove top in a skillet with some oil.
-Serve with desired dipping sauce and sliced veggies.
-Enjoy!


I'd love to connect with you! Stay updated on the latest posts through Facebook or follow savvy_chef on Instagram. Tag #savvychef with your re-creations!


Wednesday, April 15, 2015

Asparagus and Zesty Lemon Grain Salad


I created this salad as a challenge to myself to go beyond simple grilled asparagus. Every time I buy the green stems I feel like I cook then in the same manner...which although is delicious has gotten a little boring for me. I didn't want to waste their integrity and puree them into a soup or lose them in a pasta. Asparagus represents the Spring season...refreshing, breezy and bright...and that's exactly what you'll get from this salad!


We've had this as dinner, I've taken it to potlucks and it's been my go-to lunch whenever I've had it in the fridge. I LOVE IT. I love the way I feel when I look at it with the bright green from the asparagus and the red from the tomato, I love all the textures going on in here from the crisp of the asparagus to the crunch of the walnut and the chewiness of the barley. Don't even get me started on the explosion of flavors...you're going to have to find out for yourself on that note, but I will tell you that stiring the lemon zest into the hot cooked barley will release the natural oils in the zest and let the barley absorb all the flavor...yum!


Serves 3-5

Ingredients
---------------
-2 cups water
-1 cup rinsed barley
-1/2 tablespoon salt
-1 teaspoon oil
-1 tablespoon lemon zest (about 2 lemons)

-1 bunch fresh asparagus
-2 cups chopped tomatoes
-1 cup chopped walnuts
-1 cup chopped parsley
-3 tablespoons lemon juice (about 2 squeezed lemons)
-2 tablespoons extra virgin olive oil
-1/2 teaspoon freshly cracked black pepper
-salt to taste

optional:
-1 cup valbreso feta cheese
-1/2 cup finely chopped red onion
-1 large chopped avocado

To make
-----------
-Bring 2 cups water to a boil in a pot and drop in rinsed and drained barley, salt and oil. Reduce your heat to medium low then cover the pot and cook about 20-25 minutes or until the water is absorbed and your barley is soft and fluffy. Remove from the heat, uncover and add lemon zest and stir. Leave your barley to cool completely before adding other ingredients.
-While your barley is cooking, heat another pot filled with water and bring to a boil. Lightly salt your water and rinse asparagus. Gently snap off the bottom of your asparagus and drop into the boiling water. Cook for 2 minutes then immediately remove and drop asparagus into a bowl filled with ICE and water. This is called an ice bath and is done to stop the cooking process and shock the asparagus into retaining its vibrant green color. Leave the asparagus until it has cooled and then remove from the water and pat dry with paper towels. Roughly chop at a diagonal angle into 1 inch pieces.
- When your barley has cooled, place it into a bowl and  layer chopped tomatoes, asparagus, walnuts and parsley. You can now add optional toppings. Squeeze lemon juice and sprinkle black pepper on top. Drizzle the olive oil around the edges of the bowl.
*If you are making this ahead of time cover and place in your refrigerator until ready to use.
-Mix when ready to serve and taste to adjust lemon and salt content. Place into a platter and serve.
-Enjoy!


I'd love to connect with you! Like SavvyChef on facebook and follow Savvy_Chef on instagram. Tag @SavvyChef in your creations  :)


Looking for more salad inspiration? Try some of my favorites here! I especially enjoy
Mexican Bean and Corn Salad
Pomegranate + Green Bean Lentil Salad

Middle Eastern Tabbouleh 
Arugula and Roasted Beet Salad


Friday, December 12, 2014

Green Bean, Pomegranate and Sweet Potato Lentil Salad


So...maybe I'm on a lentil craze lately, but I can't help myself, the fiber content is just too awesome to ignore. I thought about this recipe a lot before I put it together. I wanted to create a salad that was different yet highlighted seasonal produce at their peak. Many of us are recovering from Thanksgiving and markets in America have readily made sweet potatoes and green beans available, so I put them together with some of my favorite ingredients for this satisfying, unique and unforgettable salad. Every ingredient will have you pausing in delightful surprise...who knew that green beans went well with pomegranates? Or sweet potatoes with lentils? Or that you could throw dates and maple syrup into a savory salad? Apparently I did, and I'm so excited to share it with you! A bonus perk is the fact that its paleo, gluten-free and vegan...score!


This is a sophisticated salad for the developed palette..."frou frou" ;)  The portion is just right for my husband and I to lunch on for a few days before its gone. The leftovers are BEAUTIFUL...nothing soggy or wilted, amazing for a salad! It also tastes great cold or at room temperature, which makes it a great picnic or potluck item to take and leave out without worrying about it going bad.


Serves 2 as dinner or 4 as a starter

Ingredients
---------------
-2/3 cup dry brown lentils or 1 1/2 cups cooked lentils (any color works, I just used brown for color contrast to other ingredients)
-6 cups salted water
-One piece of red onion (optional, but this flavors the lentils while cooking)
-8 ounces (about 2 loosely packed cups) fresh green beans
-1 cup diced sweet potato
-1 cup fresh pomegranate seeds
-4 medjool dates
-2 tablespoons thinly slivered red onion
-2 tablespoons chopped walnuts
-1 teaspoon cumin seeds
-1 scant tablespoon extra virgin olive oil
-1 scant tablespoon maple syrup


To make
------------
-Wash and strain lentils. Place in a a saucepan with salted water and a piece of the onion and bring to a boil. Once mixture is boiling, reduce heat and simmer for about 30-35 minutes, or until the lentils are soft with a slight chew.
-While lentils are boiling, wash, stem and chop green beans into 1/2 inch pieces. Bring another pot of simmering water to a boil and drop green beans into the water. Boil for about 2 minutes then immediately strain from hot water and place into a bowl filled with ice and cold water. This is called blanching the beans and prevents them from over cooking to retain their bright green color and a crisp texture. Let the beans cool in the water for a minute then strain well from the water and place into your serving bowl.
-Heat the same saucepan used to boil the beans and saute (I didn't use any oil but you can if you'd like) the chopped sweet potatoes. Season with salt and pepper and stir frequently. Cook for about 5 minutes, until browned on the outside and softened when you taste a piece. Once these are finished cooking, remove the pot from the stove and allow the sweet potatoes to cool completely, then add them to the green beans.
-Add the pomegranate seeds to your serving bowl.
-Pit the medjool dates and then cut into thin, long slivers. I cut about 7-8 slices from each date. Add the slivered date slices to the serving bowl.
-Chop the red onion and add to the serving bowl.
-Break up the walnuts into small pieces and add to the serving bowl.
-Add cumin seeds then drizzle olive oil and maple syrup to the other ingredients and gently mix the salad. Taste and adjust the salt seasoning. Salt really helps bring out the flavors and cut back on the sweetness, so make sure to season properly.
-Serve cold or at room temperature and enjoy!


I'd love to connect with you! Like SavvyChef on facebook and follow Savvy_Chef on instagram. Tag Savvychef in your creations and pin the recipes on pintrest :)

Thursday, December 4, 2014

Musakhan: Middle Eastern Chicken Rolls


These are pretty much the Middle Eastern version of taquitos :) Musakhan chicken wraps are based on a classic Palestinian dish that has gained in popularity all over the Middle East in sandwich form. Traditionally whole chicken pieces are seasoned and cooked in a clay oven then placed on top of fresh flat bread. Classic musakhan (msakhan/imsakhan) is a special meal shared with a group of  family and close friends where everyone gathers around and gets their hands dirty eating the chicken and bread...often times straight from the large platter it is served on. It is truly a delicious meal to eat and one that I will share with  you sometime. This version is for a beginning or busy cook, looking for something fast, delicious and e.a.s.y. I love to prepare a batch of these and keep them unbaked in the freezer, ready to be grilled at a moment's notice for a quick lunch or on the go meal.

Using rotisserie chicken is a huge time saver, and this is also a great recipe for leftover chicken. Simply scale back on the portions to make as much as you need, my general rule is 1 cup onions/1 cup shredded chicken/ 2 tablespoons sumac seasoning and you can take it from there. The measurements I've listed make about 18 tortilla wraps. and usually each tortilla is cut in half or in thirds. If I'm making them as a main meal I leave them whole, otherwise I do cut them. The pictures in this post show the rolls cut in half.


Typically there is no lemon juice added to musakhan but I like to include it to provide juiciness to the filling while cutting back on the oil and enhancing the sour tang of sumac. If you're not trying to make this as healthy as possible, go ahead and use more olive oil. I add a tablespoon at the end of the cooking process because I've found that it enhances the olive oil flavor without having to use too much in the beginning. Many people will just saute onions, add chicken and sumac and call it a day...but that's not the way we roll at SavvyChef. Our food has texture, flavor, complex layers of subtlety, and you just can't get that without spending a little extra effort on the filling. This dish is almost guaranteed to be present at any Middle Eastern dinner party because of its simplicity and popularity, but I promise you: all musakhan rolls are not created equal.

The main flavor in the filling is the sumac, a seasoning that comes from sour berries that are dried and ground into a spice. It is purple in color and has a tangy flavor similar to lemons. You can buy sumac from any Middle Eastern market or online. The spices that are listed as optional are not traditional and many people leave them out, but I never do as they really provide for a flavorful filling, I encourage you to use them. My children like to dip these in plain yogurt, which is a little blasphemous for traditional  musakhan eaters, but hey...whatever provides for a peaceful meal around here is fair game...


Makes about 18 full wraps (feeds 6-8 for dinner or 20 for an appetizer)

Ingredients
---------------
-2 tablespoons olive oil
-4 cups thinly sliced red onion (or other variety)
-4 cups cooked, shredded chicken (Rotisserie chicken is a GREAT short cut)
-4 tablespoons lemon juice
-1 cup sumac seasoning
-1/2 teaspoon black pepper
-1 teaspoon allspice
-optional: 1 tablespoon lemon pepper seasoning
-optional: 1 tablespoon ground coriander
-optional: 1/2 teaspoon ground cardamom

-optional: 1 cup toasted nuts (usually pine nuts, but slivered almonds are a good substitute)
-1 tablespoon olive oil
-about 18 flour tortillas

To make
------------
-Heat oil in a large pot then add sliced onions. Saute until caramelized, about 15 minutes, stirring frequently. This is a good time to shred your rotisserie chicken.
-Add shredded chicken, lemon juice, sumac, black pepper, allspice, coriander and ground cardamom. Break up the chicken as you cook and mix the ingredients together, letting the chicken soak up the flavors and seasonings. Cook mixture on low heat for about 5 minutes. Add optional toasted nuts and then remove the pot from heat.
-Place the pot aside to cool the mixture and add final tablespoon olive oil. Use the best quality you have.
-Preheat your oven to 450 degrees and line a baking sheet with foil. Spread between 1/3-1/2 cup of chicken filling along the longest length of your tortilla in a horizontal line, starting 1/2 inch up from the bottom. Make sure your filling is spread evenly across, then bring the bottom edge of the tortilla up over the filling and wrap tightly. Place the rolled tortilla seam side down on the baking sheet. Continue this process until you have finished your chicken filling.
-Optional: Brush the wrapped rolls with olive oil to enhance crispiness when toasting. (You can cook these in a skillet, griddle, panini press or in the oven. When I make them for a crowd I always place them in the oven because I can do them all at once. Sometimes I'll skip preheating the oven and just place the tray on the middle rack of my oven on broil, watching CAREFULLY for a few minutes while the tops toast). Bake on the middle rack of a pre-heated oven for about 10-15 minutes or until toasted to your liking.  Remove from the oven and let cool slightly before you cut them in half or in thirds. Another option is to cut them before toasting as this will give you toasted edges on all the pieces.
-Serve and enjoy!

Evenly spread 1/3 cup chicken filling across tortilla
This is a perfect starter recipe for beginning cooks
Brushed with olive oil and ready to bake
I'd love to connect with you! Like SavvyChef on facebook and follow Savvy_Chef on instagram. Tag Savvychef in your creations and pin the recipes on pintrest :)

My daughter shared her finished musakhan with friends

Monday, November 17, 2014

Beef, Pea and Carrot Stew


Busy weeknights have me turning to this quick meal time and time again. Most of the ingredients are staples in my fridge/freezer and it comes together in about 30 minutes. Wholesome, hearty and enjoyed by all, I love cooking this and my family loves eating it. Typically it is served with white rice, but I always cook it with bulghur and vermicelli instead to really provide some whole grain nutrition. The sauce soaks up into the bulghur really well for a very satisfying dinner.


Ingredients
---------------
-1/2 large onion, finely chopped (about 3/4 cup)
-1 lb lean ground beef
-1 tablespoon ground coriander
-1 tablespoon allspice or 7-spice
-2 teaspoons salt, plus more to taste
-1/2 teaspoon ground cardamom (optional)
-2 cups chopped fresh carrots (sweet potatoes are a great alternative)
-1 lb frozen peas
-1 6 ounce can tomato paste
-6 cups beef broth or water (I like to make my own broth and freeze it for easy access, if I don't have any handy I use water)
-salt and pepper to taste

To make
-----------
-Heat a large pot on the stove and add onions and ground beef. Break up the beef into small chunks as you cook. After about 2 minutes add the coriander, allspice, salt and ground cardamom. When the meat is about halfway cooked add the fresh carrots and let them soften as  the beef juices dry up.  Cooking the meat should take a total of 10 minutes or less.
-Once the meat is cooked, add the frozen peas, tomato paste and broth (or water) and bring to a boil. At this point taste the sauce and adjust the seasoning to your liking, adding more of the spices listed in the ingredients if you find it necessary. If you are using water instead of broth you will likely need to add more seasoning.
-Lower the boiling mixture to medium low heat and let it simmer until the carrots are soft and the sauce has thickened up a bit. If your sauce is too thick add more broth, and if your stew is too runny let it boil a little longer.
-Serve with rice or bulghur.  I like to add freshly cracked black pepper or hot sauce to the adult servings for an extra kick.
-Enjoy!


I'd love to connect with you! Like SavvyChef on facebook and follow Savvy_Chef on instagram. Tag Savvychef in your creations and pin the recipes on pintrest :)


Bulghur and Vermicelli Pilaf


Most Middle Eastern dishes are served with a side of white rice and vermicelli. As a kid it was always my favorite part of the meal and I used to beg for a plate of plain rice without whatever stew it was accompanying. As I've become more health conscious over the years I've started to replace white rice with bulghur and I really enjoy it. I've watched from the side lines during the quinoa craze as I continue to cook my bulghur because it is in fact higher in nutrients than brown rice, couscous and even quinoa. Bulghur is a cracked whole wheat that is most commonly known for it's use in tabbouleh. It comes in various sizes and I use the largest size when I cook it as a pilaf.


Serves about 3 (as a side to a main entree)

Ingredients
--------------
-1 tablespoon olive oil
-1/3 cup vermicelli noodles
-1 cup bulghur #4
-2 cups water (preferably boiling)
-salt to taste

To make
-----------
-Heat oil in a medium saucepan. Place bulghur in a strainer and wash it well. Toast vermicelli noodles for about 2 minutes on high heat, until they become golden brown (careful not to burn, it happens quickly!)
-Add washed and strained bulghur to the pot and saute until toasted, about 5 minutes. If you have a perculator I recommend heating water during this time so you don't have to wait for it to boil in the pot. 
-Add water to the toasted vermicelli and bulghur mixture and bring to a boil. Add salt to your liking and taste the water. It should be a bit saltier than you like it as the salt flavor will lessen when the bulghur absorbs the water. 
-Place the lid on your saucepan and reduce the heat to medium low (just above the low setting) and let it simmer for 20-25 minutes.  On my stove it is always cooked at 22 minutes. Once 20-25 minutes have passed, uncover the pot, stir the bulghur and cover again and let it rest for 5-10 minutes. The pilaf is ready when the water is absorbed and the bulghur looks fluffy and has a soft and chewy texture.
-Serve with your main entree and enjoy!

I'd love to connect with you! Like SavvyChef on facebook and follow Savvy_Chef on instagram. Tag Savvychef in your creations and pin the recipes on pintrest :)

Thursday, October 2, 2014

Pumpkin Spiced Chili


I craved a hearty chili for several weeks before making this. Normally I'm not a huge fan of beans, but this year I'm liking them more and more. I considered making this dish completely vegetarian, but a true chili recipe has to include a meat! Feel free to replace this with ground turkey, chicken, tofu, pieces of pumpkin, sweet potato or butternut squash. I think it would still taste delicious, but it just perfectly hit the spot for us with ground beef. I served this with homemade pumpkin cornbread and it was a meal that no one complained about...which in a house with 3 little ones is a rare occurrence! They especially loved the idea of customizing their own bowls and got creative with their combinations.

Chili is even more flavorful the next day and this is a GREAT slow cooker recipe! After browning the onions, garlic and ground beef transfer to a slow cooker, add the rest of the ingredients and let it simmer on low for a couple hours while you go about your day knowing that magic is taking place in your kitchen ;) If you are reheating the next day add a little water to thin out the chili as the beans will have soaked up the extra liquid and the flavors will be quite intense.


Serves about 4

Ingredients
----------------
-1 tablespoon oil
-1 cup chopped onion (about half of a large onion)
-5 garlic cloves
-1 tablespoon cumin seeds
-1/2 pound ground beef (I used 98% lean)
-2 tablespoons chili powder
-1 tablespoon coriander
-1/2 tablespoon all spice
-1/2 tablespoon ground ginger
-1 tablespoon pumpkin pie spice (a mixture of nutmeg, allspice, lemon peel, cloves and cinnamon)
-3 large tomatoes (or 1.5 cups canned tomato sauce)
-1 cup water (plus up to 1 cup more if your sauce is too thick)
-15 ounce can of cannellini beans (white kidney beans) drained and rinsed
-2 tablespoons pumpkin puree (optional...this adds more nutrition and gives the chili sauce a silky texture but is not critical for flavor)

Optional topping ideas
---------------------------
-Greek yogurt or sour cream
-shredded cheddar cheese
-cilantro
-diced tomato
-green onions
-avocado
-corn chips
-cornbread


To make
-----------
Browning the onions and toasting the cumin seeds
-Heat a dutch oven (ceramic pot...or any other pot) for a few minutes until it gets hot. Add 1 tablespoon of oil and let it heat for about 30 seconds.
-Add onion and let it cook for about 2 minutes on medium high heat
-Using a food processor, pulverize the garlic and add to onions.
-Add cumin seeds and continue sauteing until the garlic and cumin seeds become fragrant and the onions are soft.
-Add ground beef, chili powder, coriander, all spice, ground ginger and pumpkin pie spice and cook meat for about 5 minutes. You don't want to over brown the beef. Just cook it until the juices run clear and don't break it up too finely as you cook it.
-Wash tomatoes and chop into 4 large chunks. Place in food processor and pulverize until they are saucy. Add the tomato puree to the ground beef. Place the cup of water in the food processor and swirl it around to get the remained tomato puree and bits of garlic, then add the water to the pot.
-Add the drained and rinsed can of cannellini beans to the meat and tomato mixture.
-Add the pumpkin puree and stir. Taste the chili and adjust the seasonings to your liking. This is a good time to add salt.
-Lower the heat, cover the pot and let your chili simmer for about 30 minutes or until the sauce is as thick as you like it and the beans and meat are soft.
-Top however you'd like and serve.
-Enjoy!
Pumpkin cornbread was the perfect side to soak up the chili sauce :)

I'd love to connect with you! Like SavvyChef on facebook and follow Savvy_Chef on instagram. Tag Savvychef in your creations and pin the recipes on pintrest :)

Monday, September 29, 2014

Mulukhiya (Simmered greens and chicken) with rice


I grew up eating mulukhiya...as did 99% of Syrians and most other Middle Easterners of the world. My  memories of summer's in Syria or California are filled with images of my child self picking the fresh leaves off the stems of literally a huge CARTON filled to the brim with 30 pounds of mulukhiya. I think its because of these long and endless sessions of picking leaves that I actually really disliked this dish as a child lol. My mom tried to make it fun for us by renting movies and buying ice cream to entertain us while we picked...but the job was just too tedious. After the hours spent picking the leaves, my mom soaked them several times in huge buckets of water to clean them. This step would take her all day. At the end of that night she would lay out clean bed sheets on all flat surfaces in the kitchen and dining room and spread the washed leaves in a flat layer to dry out. This step took several days, as the leaves had to completely dry and even crisp. At this point she packaged them into bags and froze them to use throughout the year. When the leaves dry out they shrink significantly so after everything was said and done we'd have enough mulukhiya for about 6 meals or so that year. In the opion of a child, so. not. worth. it. In the opinion of an adult, still. so. not. worth. it.  My mom disagrees (probably why my Middle Eastern food will never taste as good as hers!) and still goes through this process every summer. Whenever I drop by and she's got the leaves spread out and drying I'm hit with a wave of nostalgia from the smell that fills the house.

I've been cooking in my own kitchen for quite a while now, and I'm proud to say I've never picked a mulukhiya leaf :) Nowadays the cartons are sold picked and ready to be washed and dried, but the traditional mothers aren't satisfied with the quality of those leaves and prefer to do it the good 'ole fashioned way. I prefer to walk through the freezer section of a Middle Eastern market and pick up a few bags of picked, washed, dried and frozen mulukhiya. Probably the taste is not exactly the same, but its close enough and definitely worth the lack of hassle.


Now that I've finished my rant on my history with fresh mulukhiya, I'd like to share that I frequently make this dish following the same steps but switching out the mulukhiya for another green...often which is fresh. The flavor isn't the same, but everything still tastes good and regardless of which green you use, its extremely healthy. I use leftover lemon garlic sauce from my sheesh tawooq recipe, and if you have leftover chicken, use that (without the potatoes) for this meal and you'll be halfway closer to a finished dinner. Serve this with short grain rice cooked with vermicelli noodles or toasted pita bread for an ethnic meal that will transport you back to simpler times and fuller stomachs :)

Serves 5

Ingredients
---------------
-1 teaspoon oil
-1 1/2 pounds boneless skinless chicken breast, cut into 1 inch cubes
This is the mulukhiya I used this time
-1 teaspoon all spice
-1 tablespoon coriander
-1 teaspoon salt
-1/4 teaspoon ground pepper
-1 tablespoon lemon pepper (optional)

-1 teaspoon oil
-28 ounces frozen "molokhia LEAVES" (make sure not to buy minced). You can sub this for spinach, kale or chard. If using fresh leaves, use about 6-8 cups
-3 tablespoons of lemon garlic sauce OR 3 tablespoons minced garlic
-1 tablespoon red pepper paste (optional, but delicious)
- 1-2 cups chicken broth or water
-1 teaspoon salt

-1/2 cup minced fresh cilantro
-1/2 cup dry toasted sliced almonds
-lemon wedges for serving

Instructions
---------------
-Heat a large pot with 1 teaspoon olive oil. Add cut up chicken breast, all spice, coriander, salt, pepper and lemon pepper and saute about 5 minutes until chicken is browned on the outside but not cooked through.
-Remove chicken to a bowl and return pot to stove. Add another teaspoon oil and frozen greens. Saute 5-10 minutes until water starts to dry up. Add lemon garlic sauce, red pepper paste, 1 cup water and salt.
-Return chicken to the pot and simmer on medium low heat for about 35 minutes. Greens should be tender but not too mushy. As they cook, you may add more water as necessary to have a little bit of a sauce but not a soupy mixture.
-Once the greens are cooked and chicken is tender, stir in the fresh cilantro. Adding this at the end brings a brightness to the dish in terms of color and taste.
-Plate in a bowl and cover with sliced almonds.
-Serve with pita bread or rice with lemon wedges on the side to be squeezed individually on each plate.
-Enjoy!


I'd love to connect with you! Like SavvyChef on facebook and follow Savvy_Chef on instagram. Tag Savvychef in your creations  :)


Tuesday, September 16, 2014

Chipotle Black Bean Quesadillas with Cumin and Chive Dipping Sauce


This quesadilla was sort of a happy accident...I didn't even plan on posting the recipe (hence the lack of great photos) but so many of you have requested it after my instagram photo that I figured you'd be happy to find out how easy it was! I recently mentioned I've been trying to focus on more vegetarian dishes, and this dish was born as a replacement to chicken quesadillas. It's embarrassingly simple. I kinda don't want to tell you about it. But hey...we all need those "halfway there" meals, right?

I made these to take to a girl's night and they vanished pretty quick.  I heard that the ones I left at home for my family also disappeared. So I'm thinking these babies are either pretty tasty or they have a magic component that makes them vanish into thin air...

Serving: 1 quesadilla

Ingredients
---------------
-1 10 inch flour tortilla
-1 Morning Star chipotle black bean veggie burger (I purchased at Costco)...alternatively if you don't have access to these veggie burgers you can mix a 15 ounce drained can of black beans and same sized can of drained corn with 1 tablespoon taco seasoning, but it won't have the exact same texture or flavor that everyone is raving about.
-3 tablespoons shredded Mexican blend cheese
-cooking spray
-1 teaspoon taco seasoning

To make
-----------
-Preheat oven to 425 degrees.
-Spray tortilla with cooking spray and sprinkle taco seasoning over the oiled side. Fold over flour tortilla in half to make a half moon, with the seasoned side facing out. Open the tortilla up and sprinkle half the shredded cheese.
-Remove the veggie burger from package and break it up to fit over the cheese. Don't worry about precooking the veggie burger.
-Sprinkle the remaining portion of cheese and close the tortilla into half moon shape.
-Place onto a baking sheet and bake in the middle rack of the oven for about 10-15 minutes, or until the tortilla crisps and cheese melts
-Remove from the oven and cut in half.
-Serve with dipping sauce.
-Enjoy!


Cumin and Chive Dipping Sauce
----------------------------------------

This sauce is very versatile and one I make to accompany many dishes. I switch up the flavors a little bit every time but I've found that my basic version is everyone's favorite, so that's what I'll share with you :)

Ingredients
--------------
-1 cup plain yogurt (I usually use fat free)
-2 tablespoons milk (start with 1 tablespoon and add more to desired consistency)
-2 tablespoons dried chives (or diced fresh green onions)
-1 teaspoon cumin seeds
-1 teaspoon paprika
-1 teaspoon ground coriander
-salt and pepper to taste
-optional: 1 tablespoon fresh cilantro

To make
------------
-Mix all the ingredients in a bowl until everything is incorporated and smooth.
-Serve and enjoy!

I'd love to connect with you! Like SavvyChef on facebook and follow @savvy_chef on instagram.  Tag #savvychef in your creations!

Friday, August 15, 2014

Balsamic Fig and Arugula Pizza

 
When I enjoy something, I can't just 'like' it, I have to 'LOVE' it.  And when I love it, I think about it constantly, talk about it annoyingly and just let it consume me completely. The 'it' I keep referring to in this case is my current obsession: fresh figs! I heart them with all my heart. So much so that I refuse to look up the calorie count for figs because I want to eat them without mentally calculating anything.

Since I'm obsessed (rightfully so) I try to figure out how to incorporate them into every food category possible. Fig jam has been a long time favorite of mine, and if you haven't tried Trader Joe's fig butter, I suggest you run over there now and grab a jar.  Fig balsamic vinegar came next, found in specialty shops and farmer's markets. Dried figs are a must in my home, and soon I'll share my fig truffles recipe with you guys.

But today...today, I bring you my latest and greatest.  I thought about this recipe and researched "the internets" long and hard for the best combination. There's nothing like this out there, I'm very pleased to admit ;)  The sweetness of the honey blends perfectly with the softness of the figs, and the balsamic glaze is a tart and sweet combination to the figs. The smoked mozzarella adds another dynamic of flavor that is mellowed out with the creamy ricotta. The crunch of the nuts, the tang of the red onion...this pizza is a culinary delight to your taste buds!

Makes 1 pizza

Ingredients
--------------
-1/2 cup cornmeal (optional)
-1 pound fresh pizza dough
-1/4 cup honey
-8 ounces smoked mozzarella log, sliced into 1/4 inch pieces
-8 ounces ricotta cheese
-2 cups fresh figs, cut in half or quartered
-1/4 cup fig balsamic vinegar (or best quality, thick vinegar glaze you can obtain)
-2 cups arugula
-1/4 cup finely diced red onion
-1 tablespoon walnut oil (or olive oil)
-1/3 cup chopped walnuts
-1/2 teaspoon salt
-1/2 teaspoon black pepper

To make
------------
-Preheat oven to whatever temperature you bake your dough. I usually bake mine at 400 degrees. Spray a cookie sheet or pizza pan with non stick spray and sprinkle cornmeal over the pan. Shake the cornmeal around and tap out the excess into a sink. Stretch out your pizza dough and bake halfway on LOWER rack in the oven, about 6-8 minutes for my dough.
-Remove half baked pizza dough from the oven and arrange sliced mozzarella diagonally on the crust, about 1 inch apart across the dough. Then spread ricotta in the gaps between the mozzarella pieces. Arrange figs, flesh side down, on top of the cheese. Sprinkle the pizza with black pepper. Return to the oven and bake about 10 more minutes on the MIDDLE rack.
-While pizza is baking, mix together arugula, red onion, walnuts, salt and oil in a medium sized bowl.
-When the mozzarella is melted and the figs look a little caramelized, remove from the oven and drizzle the balsamic glaze on top. Lightly spoon the arugula mixture all over the pizza, slice and serve. I sliced the pizza into 24 slices using a baking sheet.
-Enjoy!


Follow Savvy_chef on instagram and tag me in your posts, I'd love to see what you make :)